So, the next step of the engine rebuild was to rebuild the
cylinder heads with new valve springs.
At this point I got to use a new tool which quickly became a
favourite; forceps which are excellent for grabbing hold of the cotters.
With the old valve hardware out of the way I could then
measure up and shim to get the exact seat force required with the new valve springs. This involved measuring up the
gap between seat and spring cap and then choosing form a selection of shim washers.
This was one of a number of slow and careful hand building
and adjusting processes I went through with this engine trying to do my best to
get an accurate build to the best condition and included having to file the gap
on every ring on every piston (2 compression plus 3 piece oil ring each).
The pistons also re-introduced me to the joys of ‘Spirolox
Rings’ a version of a circlip that is used on the best piston designs to hold in the
gudgeon pin (wrist pin in America).
Working these little beasties into position was a
combination of patience, care and a lot of fingertip and fingernail injuries
when the only tool that would work turned out to be the one that come on the
end of my wrists!
However, all the effort felt worth it when I could look on
my full set of pistons, rods, rings and sexy ARP Big End Bolts!
I had bought a windage tray which is supposed to stop sump
oil getting churned up by the crank to reduce oil temperature and increase
power a little but after trial fitting it and making a few minor changes to
adapt it to work with the high flow – high pressure oil pump I then discovered
that the sump I had also ordered with ‘wings and baffles’ fouled the tray so it
had to go. Hopefully the sumps own try is more than capable of doing a good job.
So the next steps were to install the crank and then fit all
the piston and rod assemblies.
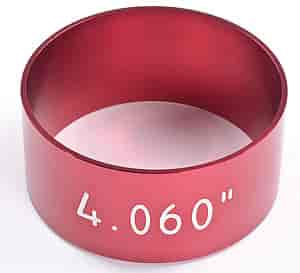
To help out with getting them into the bores I had invested
in a dedicated piston installation collar. Basically a tapered tube that
replaces those awful thin steel collar and band devices that cut fingers and
break piston rings. It may have been a luxury but it made this part of the
build a doddle and joy to do.

In this picture I had already also put on the timing chain
and harmonic damper.
With the engine stand increasingly drooping under the
increasing weight of the engine assembly it was now full speed ahead to put the
rest of the engine together.
By this point you may have noticed that I had developed a
bit of a thing for high quality bolts / hardware so you’ll not be surprised to
see more of ARP’s finest being used to hold the heads down!
Also, just in case I forgot you can see that I have been marking everything with the cylinder number on it to make sure it all goes together the right way.
As I mentioned in an earlier blog, one of the key
restrictions on engine tuning is that Historic Racing Rules require that I
stick to OEM spec Stamped Rocker arms rather than fancy modern roller rockers. By comparison to the ARP bolts and the gorgeous engraved
pushrods from Comp Cams, the rockers look very agricultural in the engine but at least
I know that if I’m ever asked to remove the rocker covers I have nothing to
hide from the inspectors.
From here it was just a hop, skip and a jump until the motor
was complete!
Those with eagle eyes will note the wood prop under the
front pulley to help support all that cast iron on my poor engine stand!